[span3][dropcap style=”circle”]1[/dropcap][/span3][span9]Perform a standard corneal incision parallel to the iris plain at the corneal limbus using a 19G blade.[/span9]
[span3][dropcap style=”circle”]2[/dropcap][/span3][span9]Perform another incision on the opposite side.
Fill the anterior chamber with a cohesive ophthalmic viscosurgical device (OVD). Inject additional OVDs between the iris and the anterior capsule to create space for the APX 200 terminal hooks.[/span9]
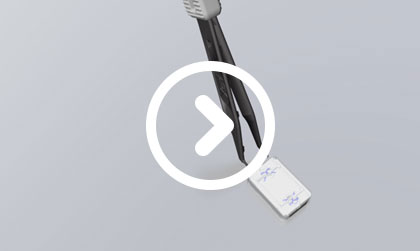
[span3][dropcap style=”circle”]3[/dropcap][/span3][span9]Load the Expanders on the APX forceps[/span9]
[span3][dropcap style=”circle”]4[/dropcap][/span3][span9] Position the tips of the forceps gently as far as possible into the slots between the white base and the transparent cover to ensure that during engagement the tips of the forceps are properly positioned in relation to the Expander.[/span9]
[span3][dropcap style=”circle”]5[/dropcap][/span3][span9]Using the forceps, make sure the Expander is fully closed to enable removal from the base.[/span9]
[span3][dropcap style=”circle”]6[/dropcap][/span3][span9]The APX forceps are equipped with a sliding lock mechanism to enable advance locking of the preloaded forceps by the physician or assistant. The locking mechanism is operated when the forceps are fully closed by sliding the slider lock down to lock, up to unlock.[/span9]
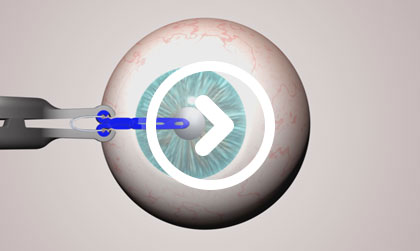
[span3][dropcap style=”circle”]7[/dropcap][/span3][span9]Press the forceps to fully close the Expander arms. Slide the slider to the unlocked position. Insert the Expander into the corneal incision until the pivot pin is located within the corneal tunnel.[/span9]
[span3][dropcap style=”circle”]8[/dropcap][/span3][span9]Partially open the Expander. Place the terminal hooks through the pupil under the iris and then open the Expander slowly. Do not completely release the Expander until the device is properly positioned.[/span9]
[span3][dropcap style=”circle”]9[/dropcap][/span3][span9]Perform the same procedure on the opposite side.[/span9]
[span3][dropcap style=”circle”]1[/dropcap][/span3][span9]Make sure that during positioning of the forceps, the Expander’s protrusions are within the slots of forceps. Position the forceps and firmly close the Expander arms.[/span9]
[span3][dropcap style=”circle”]2[/dropcap][/span3][span9]Pull out the Expander.[/span9]
[span3][dropcap style=”circle”]3[/dropcap][/span3][span9]Perform the same procedure on the opposite side.[/span9]